I am a Zivver admin
Configure and manage Zivver
How-to manually add the Zivver OWA add-in
Introduction
Use this How-to guide to quickly add the Zivver OWA add-in so that you don’t have to wait for the deployment in Exchange Online to take place.
Prerequisites
- You have granted Graph API permissions to the Zivver OWA add-in or have access to an administrator account to give access upon first startup
- You are allowed to add custom add-ins
How-to manually add the Zivver OWA add-in
Perform the below steps for each user where you want to add the Zivver OWA add-in.
This way of working is recommended if you want to start testing with the OWA add-in for a limited set of users. This way of working is not recommended for deployment of the OWA add-in to all your users. Please use the Zivver OWA add-in installation manual.
- Open the browser where you work with OWA
- In a new tab, enter the following URL in the address bar: https://owa-v6.zivver.com/manifest.xml
- Press
Ctrl+Son your keyboard to save the manifest file asXML. - In a new tab, enter the following URL in the address bar: https://aka.ms/olksideload
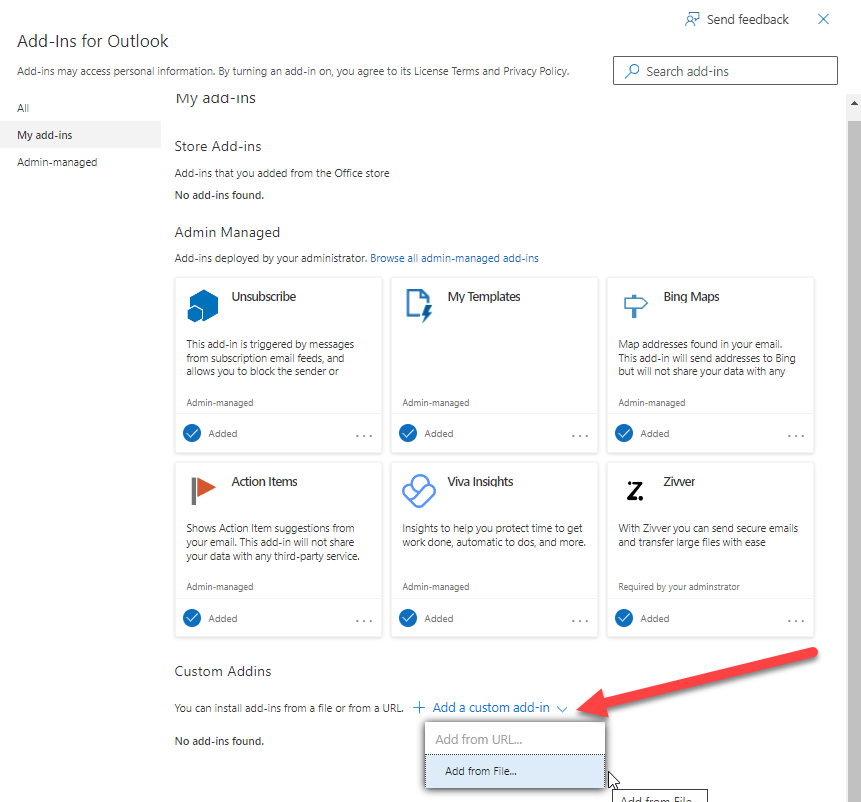
- Go to My add-ins
- Scroll down to Custom Addins
- Click Add a custom add-in
- Select Add from File…
- Upload
owa-v6.zivver.com_manifest.xmldownloaded in prior steps.