
I am a Zivver admin
Configure and manage Zivver
Installation manual Zivver add-in for OWA and the new Outlook
Each section indicates which products the steps apply to.
Introduction
OWA New Outlook
Use the Zivver Outlook Web Access Add-in to securely send and receive messages directly from Outlook Web Access (OWA) and the new Outlook. This manual describes how to install the add-in in Exchange Online, which is part of Microsoft 365. The Zivver OWA add-in is available for Exchange Online only.
In this document, we will use the labels OWA and New Outlook to indicate which product a chapter or section applies to:
- OWA means this section only applies to the Outlook Web Access add-in, which is used in the web browser version of Outlook (https://outlook.office.com).
- New Outlook means this section only applies to the new Outlook for Windows.
- OWA New Outlook means this section applies to both the Outlook Web Access add-in and the new Outlook for Windows.
In some sections, specific steps or settings apply only to one of the products. In those cases, the label will be shown next to the step or setting.
Technical requirements
OWA New Outlook
You can install the Zivver OWA add-in in Exchange Online. To use the OWA add-in, the following requirements must be met:
- Use Exchange Online.
- OWA The users’ workstations (Windows or Mac) must have the latest General Availability (GA) or Stable version of one of the following modern browsers installed:
- Microsoft Edge (Chromium-based) — recommended
- Google Chrome / Chromium (for Android/iOS) — recommended
- Mozilla Firefox
- Apple Safari (for iOS)
- OWA Cookies must be allowed in the browser for the exact URLs listed below. Read more about CookiesAllowedForUrls in Edge (this setting is identical in Chrome):
- [*.]office.com
- [*.]office365.com
- [*.]cloud.microsoft
- [*.]zivver.com
The Zivver add-in stores the user’s active session inLocalStorage. Blocking cookies for these domains will cause users to log in after every page refresh.
- OWA Pop-ups must be allowed in the browser for the exact URLs listed below. Read more about PopupsAllowedForUrls in Edge (this setting is identical in Chrome):
- [*.]office.com
- [*.]office365.com
- [*.]cloud.microsoft
- [*.]zivver.com
The Zivver add-in uses pop-ups for user authentication. Blocking pop-ups for these domains will prevent users from logging in to Zivver.
- New Outlook Offline mode must be disabled in the new Outlook.
- The Exchange policy that blocks downloading attachments in Outlook must be disabled (this is the default setting).
- An Entra ID admin account with Global Administrator privileges.
- A Zivver administrator account.
Limitations
The Start mail merge function is not supported in combination with Zivver. Using this function will result in sending unsecured messages.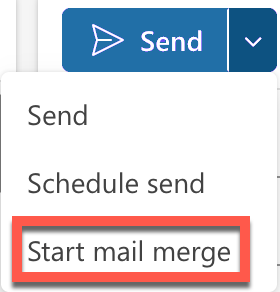
Installation
OWA New Outlook
You can install the Zivver OWA add-in either via the Microsoft 365 admin center or by using PowerShell. Both methods are explained in this manual.
Deploy and configure the Zivver OWA add-in via the Microsoft 365 admin center
OWA New Outlook
- Log in to the Microsoft 365 admin center.
- Click add Deploy Add-In.
- Click Next.
- Select Upload custom apps under Deploy a custom add-in.
- Enter
https://owa-v6.zivver.com/manifest.xmlas the URL of the OWA add-in manifest file. InfoMake sure to include
https://, even though this is already indicated in the user interface. - Click Upload.
The Configure add-in screen appears. - Choose which users will be assigned the Zivver OWA add-in:
- Everyone
All users in your organization can use the add-in. Select this to roll out the add-in to your entire organization, for example, when going live with Zivver. - Specific users/groups
Only specific users or groups can use the add-in. Select this for a pilot or if only some users use OWA. - Just me
Only makes the add-in available for your own admin account. Select this option if you want to test the add-in yourself.
 NoteMicrosoft does not support assigning add-ins to nested groups. Read more about this in their documentation.
 - Everyone
- Select how the add-in will be deployed to users:
- Fixed (Default)
Recommended. The add-in is enabled by default for assigned users and cannot be disabled by them. - Available
Not recommended. The add-in is disabled by default, but assigned users can enable it themselves. - Optional
The add-in is enabled by default, but assigned users can choose to disable it.
- Fixed (Default)
- Click Deploy.
- Review the Microsoft notice and click Next.
- Click Close.
The Zivver OWA add-in is now installed and configured for your Microsoft 365 organization. It may take up to 24 hours for the change to take effect in Exchange Online. See Microsoft's documentation for more information. - Continue with the steps to give admin consent.
Give admin consent to the required Graph API permissions
OWA New Outlook
The Zivver OWA add-in requires admin consent for your organization to work seamlessly with the Microsoft Graph API.
- Paste the URL below in a text editor:
https://login.microsoftonline.com/{organization}/adminconsent?client_id=cf4ddb54-53ba-4358-955f-38194b69acd4 - Find your Tenant ID in Entra ID and copy it.
- Replace
{organization}in the URL from step 1 with the Tenant ID you copied in step 2. - Paste the updated link in your browser.
- Sign in with your Microsoft admin account.
- Click .
Create an Exchange rule for Zivver messages
OWA New Outlook
This rule must be set up to prevent OWA from sending a Zivver message as unencrypted, regular email.
- Log in to the Exchange admin center.
- Click Mail flow in the left pane.
- Select the Rules tab.
- Click add Add a rule > Create a new rule.
- Name the rule
zivver-action: discard. - Under Apply this rule if, select The message headers ... and the sub-option matches these text patterns.
- Click Enter text.
specify header name opens. - Enter
zivver-action, then click Save. - Click Enter words.
specify words or phrases opens. - Enter
discard. - Click Add.
- Click Save.
- Under Do the following, select Block the message, and the sub-option delete the message without notifying anyone.
- Click Next.
Set rule settings opens. - Set Choose a mode for this rule to Enforce.
- Set Severity to Low.
- Select Stop processing more rules.
- Set Match sender address in message to Header.
- Click Next, then click Finish.
- Wait a few seconds, then click Done.
You can now set the priority. - Select the new rule.
- Enable the rule.
- Click Edit.
zivver-action: discard opens. - Click Settings.
- Set the priority of the
zivver-action: discardrule to0.
A mail flow rule has now been created to prevent Zivver messages from being sent as unencrypted, regular email. - Click Save, then click Done.
Required additional settings
OWA New Outlook
Enable Inbound Direct Delivery
OWA New Outlook
Inbound Direct Delivery (IDD) allows your users to read inbound Zivver messages directly from the reading pane instead of opening the Zivver side pane. To enable this feature, follow the procedure described in the Inbound Direct Delivery manual.
Allow cookies in Edge/Chrome
OWA
Allow cookies in the browser for the exact URLs listed below. Read more about CookiesAllowedForUrls in Edge (this setting is identical in Chrome).
- [*.]office.com
- [*.]office365.com
- [*.]cloud.microsoft
- [*.]zivver.com
The Zivver add-in stores the user’s active session inLocalStorage. Blocking cookies for these domains will cause users to be logged out after every page refresh.
Allow pop-ups in Edge/Chrome
OWA
Allow pop-ups in the browser for the exact URLs listed below. Read more about PopupsAllowedForUrls in Edge (this setting is identical in Chrome).
- [*.]office.com
- [*.]office365.com
- [*.]cloud.microsoft
- [*.]zivver.com
The Zivver add-in uses pop-ups to log users in. Blocking pop-ups for these domains will prevent users from being able to log in to Zivver.
Configure Exempt Domains
OWA New Outlook
Configure Exempt Domains from scanning during sending to exclude internal domains from Smart Classification.
Add-in behavior
OWA New Outlook
Configure Automatically use Zivver when a business rule recommends it to be set to On, Mandatory on the Add-in Settings page. Read more about Outlook Web Access Add-in integration settings.
Trusted websites in Internet Options
OWA
For Windows users only.
Add the following locations to the Trusted sites zone of Internet Options. This prevents a white screen during login to the OWA add-in.
- Open the Control panel.
- Click Network and Internet.
- Click Internet Options.
- Click the Security tab.
- Click Trusted websites.
- Click the Websites button.
- Add these URLs as trusted websites:
- Zivver OWA add-in:
https://owa-v6.zivver.com - Zivver OWA add-in:
https://owa-v7.zivver.com - Zivver WebApp:
https://app.zivver.com - OWA:
https://outlook.office.com - OWA:
https://outlook.cloud.microsoft
- Zivver OWA add-in:
- Click Close.
- Click OK.
macOS Safari privacy settings
OWA
For macOS users only.
- In Settings > Privacy, make sure “Prevent cross-site tracking” is unchecked.
- In Settings > Privacy, make sure “Block all cookies” is unchecked.
- In Websites > Pop-up windows, make sure “outlook.office.com” is allowed.
- In Websites > Pop-up windows, make sure “outlook.cloud.microsoft” is allowed.
Disable Offline Mode
New Outlook
In the New Outlook, users can turn on Offline mode, which causes sent messages to be stored in the Outbox. When Offline mode is later turned off, these messages are sent automatically—without involving any add-ins, including the Zivver add-in. As a result, the messages are not classified or secured by Zivver. To avoid this issue, follow the steps below to disable the option for Offline mode in the New Outlook settings.
Prerequisites
- Exchange Online admin permissions.
- PowerShell is installed on your machine.
- ExchangeOnlineManagement module is installed in PowerShell on your machine.
Procedure
Open PowerShell.
Run the following command to connect to Exchange Online:
Connect-ExchangeOnlineA pop-up appears, prompting you to enter your admin credentials.
Run the following command to list all existing OWA mailbox policies:
Get-OwaMailboxPolicy | Format-Table Name, IdentityRun the following command to disable Offline Mode for the OWA mailbox policy:
Set-OwaMailboxPolicy -Identity "<policy_name>" -OfflineEnabledWin $falseReplace
<policy_name>with the name of the OWA mailbox policy you want to modify. If you want to disable Offline Mode for all policies, you have to run this command for each policy listed in the previous step.Run the following command to verify that Offline Mode is disabled:
Get-OwaMailboxPolicy -Identity "<policy_name>" | Format-Table Name, OfflineEnabledWinReplace
<policy_name>with the name of the OWA mailbox policy you want to verify. The output should showOfflineEnabledWinasFalse. Example output:Name OfflineEnabledWin ---- --------------------- OwaMailboxPolicy-Default FalseRun the following command to disconnect from Exchange Online:
Disconnect-ExchangeOnlineVerify that users can no longer enable Offline Mode in the new Outlook by going to Settings > General. The option to enable Offline Mode should no longer be available.
Verify the installation was successful
OWA New Outlook
- Click New to create a new message.
- Set up a message with a recipient, subject, and body as usual.
- Click the Zivver icon.
If the Zivver icon is not visible, click the three dots in the Outlook toolbar at the top of your screen and click the Zivver link in the menu.
The Zivver side panel opens on the right side. - Log in to Zivver if you’re not logged in automatically.
- Turn on Secure mail.
- Click Recipient verification.
A new screen listing all recipients opens. - Complete the recipient verification where necessary.
Learn more about Recipient verification - Click Apply.
- Click Send to send the message.
A Zivver pop-up may appear to check the email and attachments for sensitive information. - Verify in the recipients’ inbox that a Zivver message has been received and no unencrypted, regular email has been received.
You have now verified the installation was successful.
Remove the Zivver OWA Add-in from Microsoft 365 admin center
OWA New Outlook
If you want to remove the Zivver add-in, follow these steps to uninstall it from the Microsoft 365 admin center:
- Log in to the Microsoft 365 admin center.
- Select Zivver.
The Zivver Add-in screen appears in the right-side pane. - Scroll down on the Zivver side pane and click Delete add-in at the bottom of the side pane.
- Confirm by clicking Delete.
The Zivver OWA add-in has now been removed.
Remove the Zivver Exchange rule
OWA New Outlook
To remove the Zivver Exchange rule, follow these steps in the Exchange admin center:
- Log in to the Exchange admin center.
- Click Mail flow in the left-side pane.
- Select the Rules tab.
- Select the mail flow rule zivver-action: discard.
- Delete the rule by clicking the delete icon.
If you used Assisted Mail Submission, you might not have created the zivver-action:discard rule.
If you are no longer using any other Zivver plugins or solutions, you can safely remove the Zivver Exchange rule (typically named “Zivver Relay” or “Zivver: Assisted Mail Submission”) that routes emails to the Zivver send connector.
Additionally, if the Zivver send connector is not used by any other Zivver solutions in your environment, it can also be removed.