
I am a Zivver admin
Configure and manage Zivver
Download and Install Zivver Office Plugin (manually updating)
Introduction
The steps below describe how to install the version of the Zivver Office plugin that is suitable for larger organizations with managed IT services. This version does not automatically update the software. Instead, system administrators need to update it manually.
Minimal technical requirements
System requirements
With the Zivver Office Plugin, you can send and receive secure Zivver messages from your inbox in Microsoft Outlook. Refer to the table for the different methods to install and deploy the plug-in, as well as the related registry settings.
| Product | Requirements | Works with ... | Compatible environment | Installation instructions |
|---|---|---|---|---|
| Office Plugin |
| Microsoft Outlook 2021 or higher |
|
1) The New Outlook does not support COM add-ins like the Zivver Office Plugin. The Zivver OWA add-in is available to use in The New Outlook.
Product specific requirements
- HTTPS connection, port 443, TLS v1.2 or higher with https://*.zivver.com.
- Outlook in Cached Mode1 or Online Mode.
- A Microsoft supported scenario when using different versions of Office, Project, and Visio on the same computer.
1) Zivver follows the recommended practice of Microsoft and Citrix for optimal performance with Outlook in Cached Mode. Performance issues related to Online Mode will be investigated on a best-effort basis.
Download link
Latest MSI installer download link
Installation
This chapter describes the installation process including the implementation of recommended Office plugin registry settings and how to install the Office plugin for a test group. This chapter also refers to other installation methods, such as:
Zivver recommends to install the Office plugin “for everyone” when the Office plugin is centrally deployed and managed. It is also possible to first do a rollout where the Zivver Office Plugin is installed “for everyone” on every target system, and then set registry keys on each system to determine for which users the Zivver Office Plugin should be active. See section Install the Office plugin for test users on a shared workspace.
Installing the Office plugin with Microsoft Installer commands
This section explains how to use msiexec to start the installation process with the help of Microsoft Installer commands.
The following shell command will perform a silent install “just me”:
msiexec /i "Zivver.OfficePlugin.Installer.msi" /quietThe following shell command will perform a silent install “for everyone”:
msiexec /i "Zivver.OfficePlugin.Installer.msi" ALLUSERS=1 USEIMPERSONATE=0 /quiet
If ALLUSERS is not specified, the Office plugin will be installed “just me”. The same is true if setting ALLUSERS = “”.
Installing the Office plugin with GPO
The Office plugin can be installed by using a Microsoft Group Policy Object (GPO). Further information can be found in Office Plugin Installation Manual via Group Policy Objects.
Installing the Office plugin with Configuration Manager
The Office plugin can be installed with Microsoft Configuration Manager. Further information can be found in Office Plugin Installation Manual for Microsoft Configuration Manager.
Installing the Office plugin with RDS
The Office plugin can be installed in an environment with Microsoft Remote Desktop Services (RDS). Further information can be found in Office plugin installation manual for Microsoft RDS.
Installing the Office plugin with Intune
The Office plugin can be installed with Microsoft Intune. Further information can be found in Office Plugin Installation Manual for Microsoft Intune.
Installing the Office plugin with RES
The product can be installed using RES ONE Automation. In Security Context enter an account which has the rights needed to perform an install on the remote machine.
Installation files
Depending on which installation option is chosen, the files belonging to the Office plugin will be written to different locations:
- With a “for everyone” installation files will be written to
%Program Files (x86)%by default.
For example:C:\Program Files (x86)\Zivver B.V\Zivver Office Plugin\. - With a “just me” installation, files are written to
%localappdata%.
For example:\AppData\Local\Zivver B.V\Zivver Office Plugin\.
The location can be changed during the installation.
Account data
The account data for a logged-in account are saved in two locations:
- Per logged-in account:
%AppData%\Zivver\OfficePlugin\accounts\ - A value is written per registered account in:
HKCU\SOFTWARE\Zivver\OfficePlugin\Secrets\
Recommended Office plugin settings
Zivver recommends to apply the following registry keys for every installation of the Office plugin. Applying these registry keys has the following effect:
- Tutorials in the Office plugin are not shown.
- Each account that is logged in remains logged in for 30 days.
- Users are logged in automatically if conditions for automatic login are met.
- The Office plugin defaults to email verification if no verification method is specified for the recipients.
- The Office plugin is enabled in Outlook and cannot be disabled by the user.
- The Office plugin cannot be disabled by Outlook.
 TipIf the Office plugin is still not visible after configuring the recommended settings, it may be that the Zivver Office plugin is listed in the registry under CrashingAddinList and/or DisabledItems. Follow the steps in this guide to clean up these registry keys.
Minimal Recommended Office Plugin Registry Key Settings (Registry file)
Minimal Recommended Office Plugin Registry Key Settings (Batch script)
Minimal Recommended Office Plugin Registry Key Settings (PowerShell script)
Optional Office plugin settings
You can find all Office plugin settings in the Office plugin registry keys article. Create a support ticket if you require assistance with configuring any of the settings.
Install the Office plugin for test users on a shared workspace
As an admin you can make the Zivver Office plugin available for test users, even when they work on a shared workspace. For example when using virtual or remote workspaces.
The steps to deploy the Office plugin for test users are as follows:
- Install the Zivver Office plugin “for everyone”.
- At the same time set the LoadBehavior value to
0. Setting the LoadBehavior to0prevents the Office plugin from being loaded on startup of Outlook on a shared workspace.
Look on the registry of the machine in the following locations:
Computer\HKEY_LOCAL_MACHINE\SOFTWARE\Microsoft\Office\Outlook\Addins\ZivverOfficePlugin.AddinModulefor a 64-bit installation of Office.Computer\HKEY_LOCAL_MACHINE\SOFTWARE\Wow6432Node\Microsoft\Office\Outlook\Addins\ZivverOfficePlugin.AddinModulefor a 32-bit installation of Office on a 64-bit workspace.
- For test users apply the Recommended Office plugin settings.
For example via GPO. The recommended Office plugin settings will enable the Office plugin for the test user.
Setting the LoadBehavior to 0 prevents the Office plugin from loading for all users on the shared workspace, while users with the AddinList set to 1 will have the Office plugin enabled. The AddinList is part of the Recommended Office plugin settings.
Verify the installation was successful
- Open Outlook
If the Office plugin is installed and enabled, then you should see a Zivver tab in the top row of Outlook.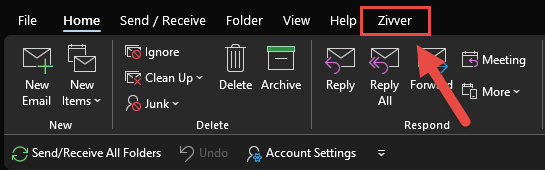
Troubleshooting installation
Visit the Office plugin troubleshooting article if the Zivver tab is not shown in Outlook.
Update the Office plugin
Updating the Zivver Office plugin (.msi) requires a manual update of the installer. If the product was installed “for everyone”, then you need administrator rights to perform an update. The “for everyone” installation writes installer files to C:\Program Files (x86)\Zivver B.V\Zivver Office Plugin\, and this location can only be written to with administrator rights.
Uninstall the Office Plugin
If you want to uninstall the Office plugin, you need to remove the application (MSI). The necessary steps to uninstall the Office plugin depend on how the Office plugin was installed. For example, refer to the Intune guide for specific steps.
In addition to removing the application, also delete the recommended additional settings from the registry.