
Getting started with Zivver for primary healthcare providers of Sleutelnet
Welcome to Zivver!
In a primary healthcare organization, you work daily with sensitive information about and relating to patients. If you want to share this information with others by email, you need a solution that allows you to do this securely. Zivver helps you send sensitive information securely and prevent data breaches. With, for example, our Outlook integration, you can easily send secure emails directly from your own Outlook environment. This way, you always have the assurance that only the intended recipient can open the information.
In this guide, we will guide you step by step to get started with secure email quickly and efficiently. We cover the following topics:
- What can you do with Zivver?
- Set up your organization
- Install Zivver in Outlook
- Optimal settings
- Training and communication
Reading guide
Each chapter explains step by step what you need to do to properly set up Zivver.
What can you do with Zivver
Duration: 2–7 minutes
Difficulty level: Easy
With Zivver, you can securely share (privacy-)sensitive information with external parties. This helps prevent sensitive patient data from falling into the wrong hands and causing a data breach.
You use Zivver from your familiar Outlook environment. With a simple toggle, you can turn secure email on or off. If you do not use Outlook, you can use Zivver in our secure environment at https://app.zivver.com.

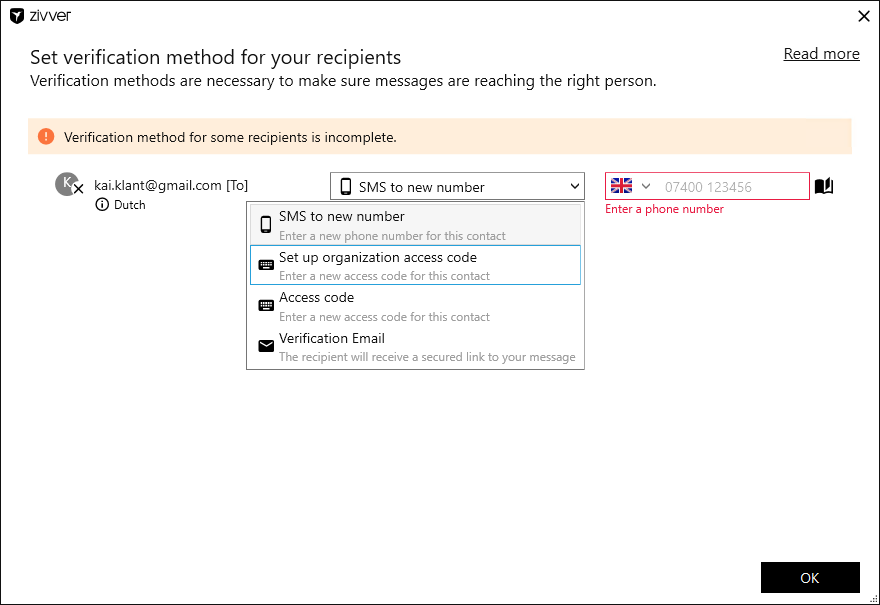
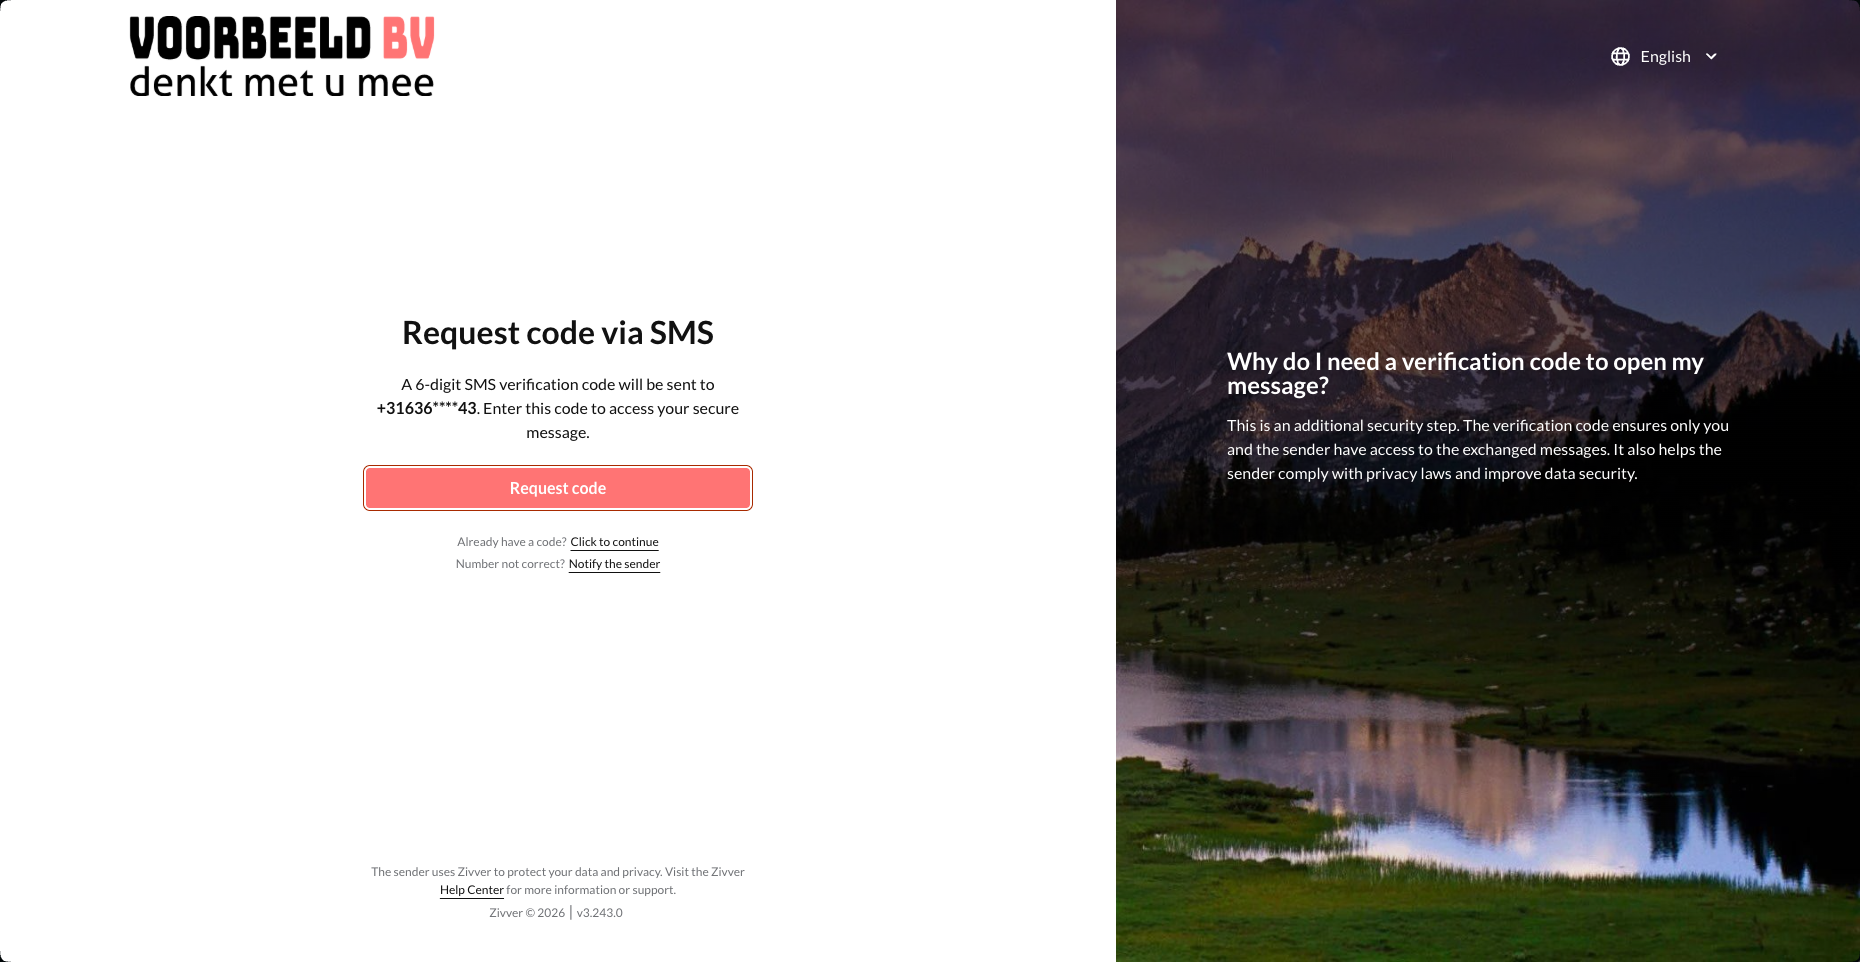
When you send a message with Zivver, Zivver encrypts the message and any attachments. This ensures that only the sender and the recipient(s) can open the contents of the message. By additionally securing the message with recipient verification (via SMS or an agreed access code), you can be sure that only the correct recipient can open the message.
Zivver also alerts you to potentially sensitive information in your email or attachment. This lets you know that additional measures are required to properly secure the message.
Set up your organization
Duration: 45 minutes
Difficulty level: Easy
In this chapter, you set up your organization in a few simple steps.
- Zivver has upgraded your business email address account to a business account. You will receive an email once this is completed. After that, you can continue with the next steps.
- Log in (again) at https://app.zivver.com. Then click the
 Organization Settings in the bottom-left corner.
 - Open
 User administration in the menu and select Accounts. Click to invite a colleague to Zivver. This colleague will receive an email to create their own Zivver account. Use Invite another for your other colleagues. More information can be found in Inviting colleagues without SSO.
 - Appoint one of your colleagues as a second administrator. Follow the steps in Appoint a second administrator.
- Go to
 General > Organization account. Set a logo here and adjust the organization name if necessary. Go to Organization account for an explanation.
 - Go to
 Recipient experience > Email Notifications and configure the texts for the notification message and the introduction email. Follow the steps in Email notifications.
 - Go to
 Policy > Business rules and enable the business rules. These help you identify when you are dealing with sensitive information. Follow the steps in Business rules.
 - Optional: If you use Outlook, enable the plugin settings. Follow the steps in Plugin settings.
Install Zivver in Outlook
Duration: 30 minutes
Difficulty level: Average
In this chapter, you will install the Zivver Office plugin for Outlook. Skip this chapter if you do not use Outlook. You can only use Zivver in the Windows version of Outlook Classic. If you use Outlook on a Mac, skip this chapter.
- Download the plugin via Download the Zivver Office Plugin, open the file, and follow the installation steps on your computer. Need help? Follow the steps in Install the Zivver Office Plugin.
- Log in to the plugin with your Zivver account. Follow the steps in Log in to the Zivver Office Plugin.
- Test the plugin. Does it work properly? Can you send secure messages without issues? Test all functionality.
- Once Zivver works correctly in your own Outlook, install the plugin on your colleagues’ workstations. Repeat steps 1 through 4. Ask your colleagues to log in with their own accounts so they can also send secure email from Outlook.
- Remove the Voltage plugin once you have successfully installed the Zivver Office plugin on all workstations.
Follow these steps on each workstation:
- Right-click Start.
- Click Apps & features.
- Select Voltage from the list.
- Click Uninstall.
- Click Uninstall again.
- Complete the remaining steps.
Optimal settings
Duration: 45 minutes
Difficulty level: Average
In this chapter, we configure optional additions to ensure your organization can use Zivver as optimally as possible.
- Set up functional accounts. Functional accounts are shared mailboxes, such as info@organizationname.com. Follow the steps in Functional accounts.
- Grant your colleagues access to the functional account. Follow the steps in Manage access to functional accounts.
- Configure the sender to be displayed when sending mail from functional accounts. Follow the steps in Configure account delegation.
- Enable or disable the desired verification methods. Follow the steps in Verification methods.
Do you use your own domain name for email? An email domain is the part of the email address after the @ symbol, for example info@organizationname.com. Your domain name is usually managed by your IT service provider, or you manage it yourself (or have it managed) with a hosting provider. Therefore, involve your IT service provider in the steps below.
- Claim the domain if you use your own domain. Follow the steps in Claim a domain.
- Ensure messages are sent on behalf of your domain by configuring SPF, DKIM, and a verification record. See Set up DNS for Zivver for an explanation.
- Has your domain been claimed? Then set up a conversation starter. Follow the steps in Set up conversation starters.
Training and communication
Duration: 60 minutes
Difficulty level: Average
In this chapter, you train your colleagues to use Zivver and handle external communication.
Train your colleagues
You can choose to provide training to your colleagues yourself.
Agree with your colleagues on what information will be sent securely and document this in a file. Record which types of information must be sent using Zivver.
External communication
In this section, you handle external communication from your organization about Zivver.
- Mention on your website that you use Zivver to communicate privacy-sensitive information. Use the following communication templates as an example.
- Define what assistants can communicate to patients and clients. What questions can they expect about Zivver messages?
- Include Zivver where possible in standard external communication materials, such as a new information guide or the annual email to patients and clients.